Synology DS412+ Review – DiskStation Manager (DSM)

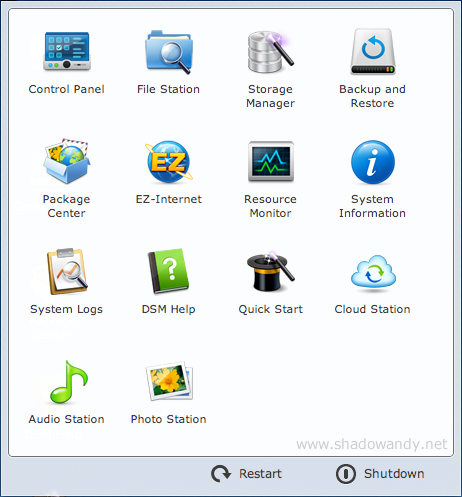
The Synology DiskStation Manager (DSM) is the Operating System (OS) that powers the Synology NAS. In most NAS, the management of the NAS is either through Web User Interface or Command Line Interface. The DSM offers a complete desktop on-web with customisable settings. Not only is the desktop customisable, it also offers a suite of management tools to keep track of the NAS status. So I can easily keep track of the DS412+ status.
The NAS statuses are summarised on the Widgets on the right of the Desktop, allowing you to monitor things like – system health, logs, storage and resource usage, etc.
The DSM use a package manager approach to let users add or remove applications. Basically, the DSM is a web-based platform and you are free to select the service/app you want to use. These services and applications can easily be installed or removed through the Package Center. 3rd party applications are supported as well, check out the Synology 3rd Party Applications page!

Installing the DSM on your new Synology NAS is a straight-forward process too.
Preparing to Install DSM
To set up the DiskStation Manager, the process is simply:
- Popping in the hard disks into the Synology NAS if you have not done so.
- Connecting the Synology NAS to the power and network port
- Downloading Synology Assistant
- Downloading the DiskStation Manager
- Executing Synology Assistant and following the on-screen instructions

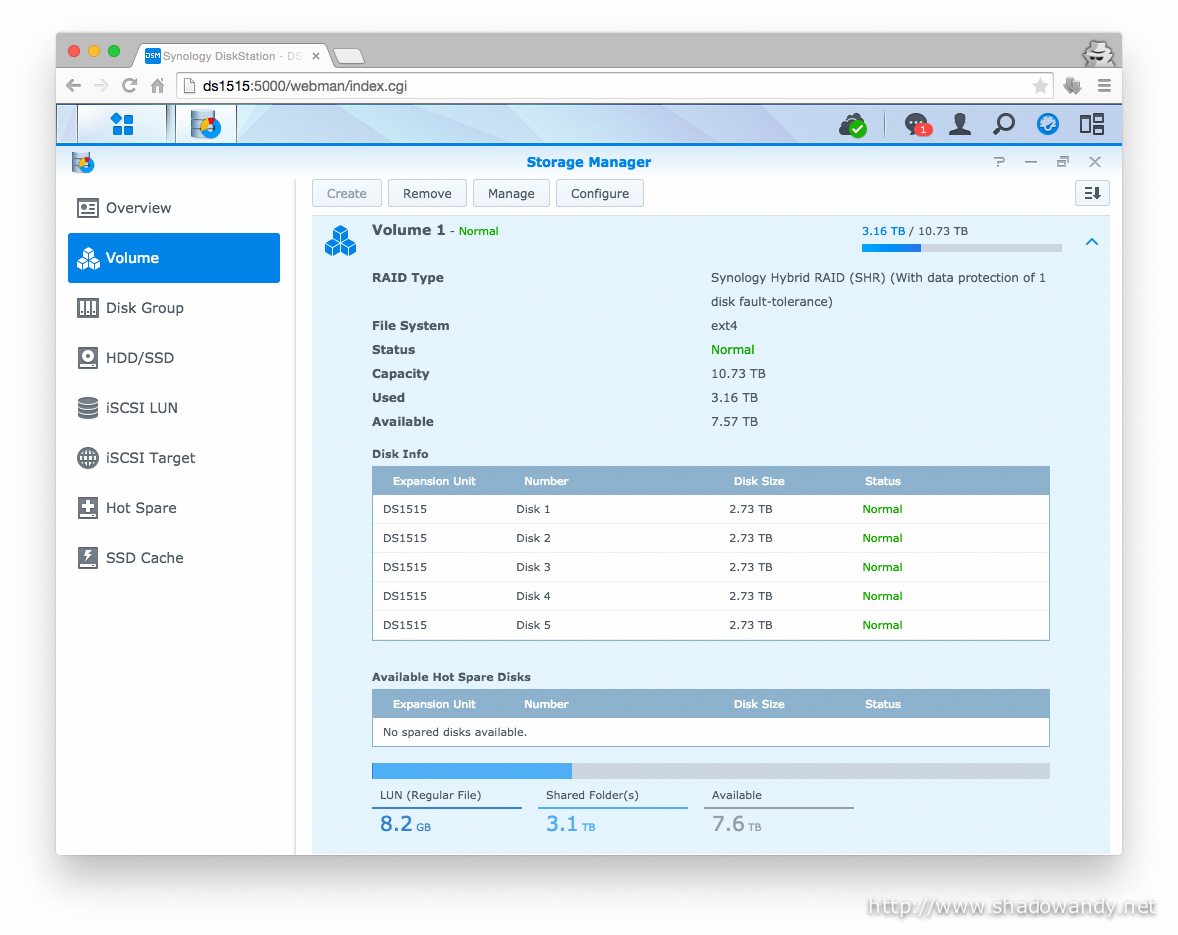
For me, I have populated the Synology DS412+ with four WD Red 3.0 TB hard drives, giving me a total of 12.0 TB of raw hard disk space!
Installing DSM with Synology Assistant

The first step is to search for your new Synology NAS using the Synology Assistant. Once the Synology Assistant have managed to search for your Synology NAS (e.g. DS212+, DS412+, DS1512+, DS1812+), proceed to install the DSM that you have downloaded earlier from Synology Download Center.

Follow the on-screen instructions until the Synology Assistant informs you that the System has been installed successfully. If you are unsure of what RAID to use, you can stick to Synology Hybrid RAID (SHR).

Completing the initial Setup
After the DSM is installed, the DiskStation will proceed to create the storage volume based on your settings earlier (for me, I have chosen SHR). Once the storage volume is created, the system will proceed to perform data parity checks. While doing the parity checks, you will not get to enjoy the full performance of the system as the disks is frequently accessed for the checks. So don’t rush into using your new Synology NAS. Give it a while or more (for mine, it took like 8 hours to complete checking the 8.05 TB Volume).
 and done with its parity checking. 8.05 TB of total space from the DS412+!")
The Western Digital Red hard drives are running pretty cool in the system. Took the following picture while I am randomly transferring files to the Synology DS412+.

With the Synology DS412+ up and running. It is time to do some tests to find out the transfer speed.
The different parts of this review series
- Synology DS412+ Review – A brief introduction
- Synology DS412+ Review – DiskStation Manager (DSM)
- Synology DS412+ Review – Speed Test
Picture Gallery